Terrain has a special type of shader that in addition to the 4 layers of usual materials can have an additional single-texture layer that is blended with the layer 0 basing on the height and slope of the terrain surface and normalmap.
In addition the terrain shader support a
color map that is multiplied for the layers of the material improving color variation of the surface.
Sometime 4 layers for a terrain material could not be sufficient for avoiding repetition due to big extension of terrain surface.
In this case you can use the
detail materials that can be thought as special kind of decals designed exclusively for terrain, each of which can have 4 layers.
When you open the painting tool, the
material editor is automatically opened and showed.
All the layers of the terrain material, the
color map and the
occlusion data can be painted using the painting tool.
To access the terrain painting tool you must click on

icon in the terrain editor.
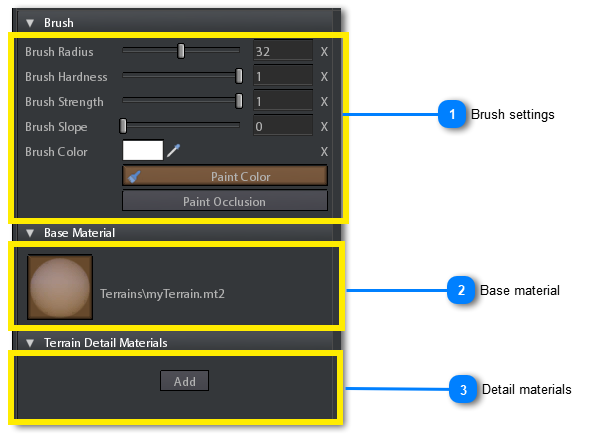
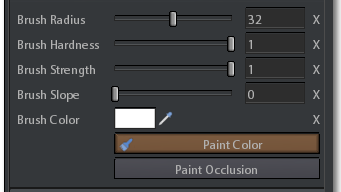
 Brush settingsBrush Radius:Radius of the painting brush. It is sized on the resolution of the material mask (i.e. a radius of 10 means 10 pixels on the mask).
Brush Hardness:Use this parameter to modify the smoothness of the brush. It is equivalent to brush pressure in the sculpt tool.
Brush Strength:Use this parameter to set how much quickly brush color (or mask) values must be accumulated on the terrain. it is equivalent to brush Strength in sculpt tool.
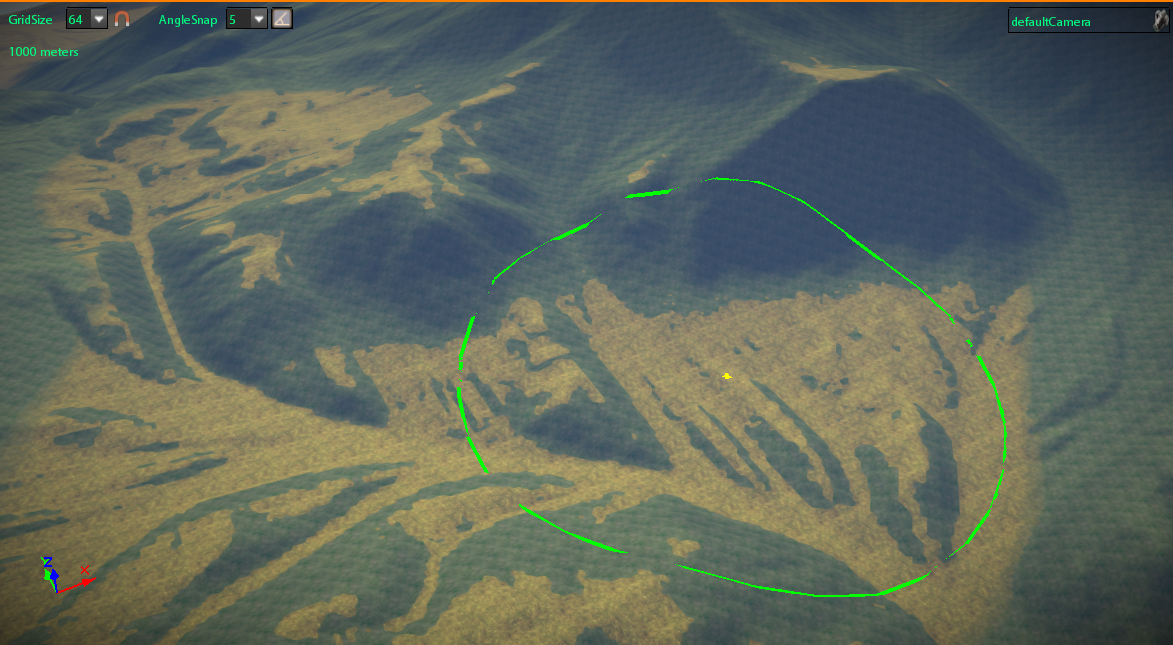
Brush Slope: Use this slider if you want the brush take into account the slope of the terrain, values near 1 mean that only surfaces almost orizontal are painted, otherwise values near 0 mean that almost all surfaces (from horizontal to vertical) are painted. In the following image the brush slope is set to 0.98 to paint the yellow layer:

The brush slope is different from maximum and minimum slope in layer settings (see below). In the case of brush slope the value cannot be changed once painted, changes are valis only from the next painting.
In the case of maximum and minimum slope in layer settings you can change them any time you want, also after painting the brush.
Brush Color:Choose the color to paint you want to multiply with the material layers. You can eventually choose it from the terrain itself by clicking on the pick icon  and click on the terrain point from which you want to get color in the scene viewport.
Paint Color: If this button is enabled the brush will paint also on colormap RGB channels, so the brush color will be multiplied with the terrain material layers. It is enabled by default.
Paint Occlusion:If this button is enabled the brush will paint also on colormap alpha channel, specifically used for terrain ambient occlusion. It is disabled by default.
|
|
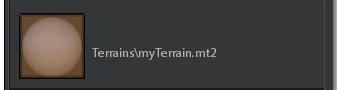
 Base materialThis is the material applied to the terrain.
It is a 4 layers material with the additiona of a colormap and an additional single texture layer that is blended with layer 0.
This material is automatically created, together with the layer mask, when the terrain is created.
As standard materials the layer 0 is enabled by default, if you want to paint additional layers you have to enabled them just as in standard materials before configuring them.

If you paint a layer and it seems that nothing is drawn, probably it is due to Mask Distance parameter value too low.
Go into material props panel and increase the value of Mask DIstance.

See Material Properties panel into Material Editor topic for more info.
If you click on the material preview icon, the material editor is automatically opened and showed.
You cannot replace this material but you can modify it using the material editor.
Terrain material in material editor has some additional properties than standard material: -
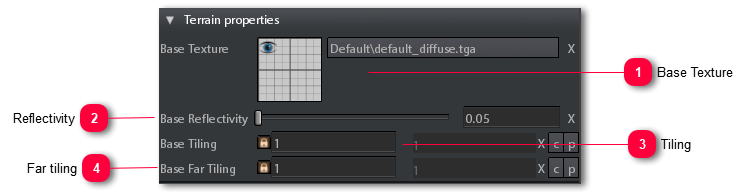
In material properties tool there is an additional section related to the additional single-texture layer that is blended with layer 0. We call this additional single texture layer Base Texture.:  Base TextureThis is the texture that will be blended with layer 0.
The first time you load this texture you shouldn't see any change, you have to play with the Maximum Slope of layer 0 to start seeing something. | |
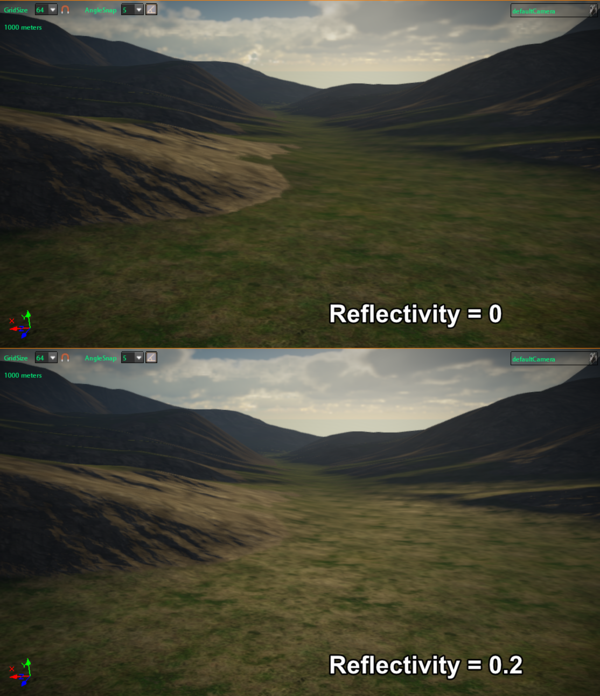
 ReflectivitySince the base texture has no normalmap (it is a single texture layer) it cannot have roughness data, but it has a constant reflectivity value (see Lighting props in material layers tool). The reflectivity value of base texture is alpha blended, basing on slope and height, with the reflectivity of the layer 0, while the roughness is absorbed from the roughness of layer 0. Valid values range from 0 to 1.
In the following image you can see the difference between reflectivity=0 and reflectivity=0.2 on the grass layer (base texture):
| |
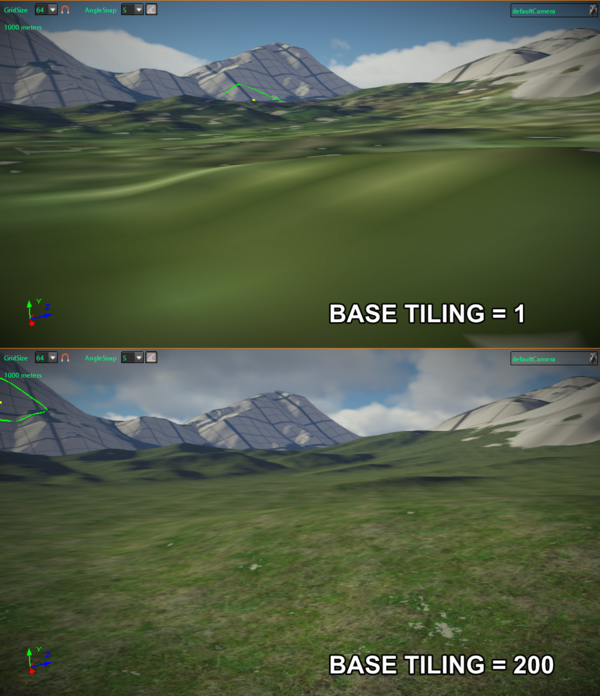
 TilingThe repeatition frequency of the base texture. Greater values means higher tiling.
| |
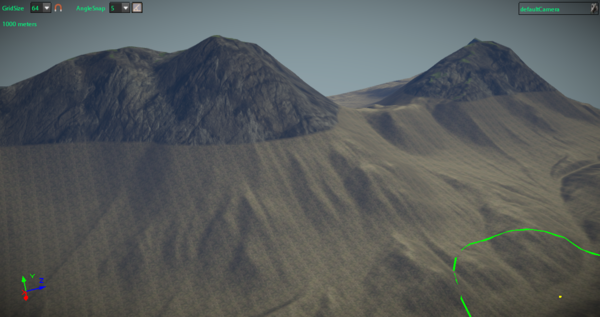
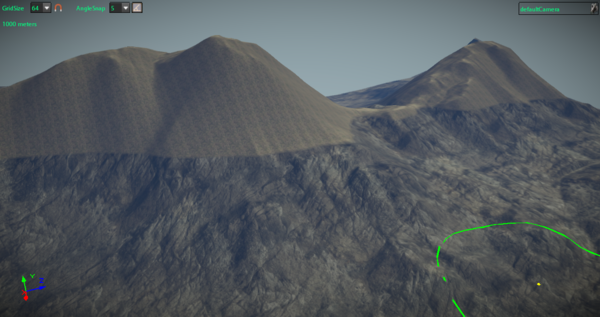
 Far tilingThe layer 0 has an additional property: it is blended with itself but with different tiling value.
This means that in the near distance its tiling can be, for example, 500x500 and in the far distance it is blended with itself but with different tiling versions until an 8x8 tiling.
This trick helps to avoid excessive repeatition in the distance while keeping details when close to the camera, all working with the same texture!
Usually default value (1) is sufficient for a good effect.
The following GIF shows the effect of Far tiling (value 1) with a rock texture, the layer near tiling in this case is 100:
| |
-
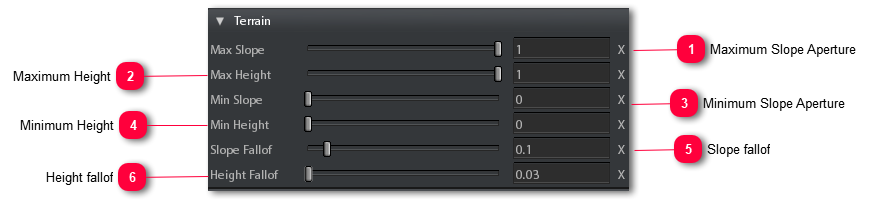
Maximum Slope ApertureThis is the maximum value of the slope aperture the terrain must have to make layer be visible.
The slope aperture is defined as the cosine of the angle between the terrain surface normal and the normal of an horizontal plane (a vertical normal).
This means that, if maximum slope aperture is 0, the cosine of the angle cannot be greater than 0, so the angle between terrain surface normal and the horizontal plane normal cannot be less than 90 degrees (cos of 90 degrees is 0), i.e. the terrain surface must be completely vertical.
Otherwise if maximum slope aperture is 1 the cosine of the angle cannot be greater than 1, so it can range from 0 to 1, so the angle between terrain surface and the horizontal plane normal can range from 0 to 90, so the terrain surface can range from completely horizontal to completely vertical.
The following GIF shows the maximum slope aperture for layer 1 ranging from 0 to 1 while minimum slope is kept to 0
In the case of Layer 0 the maximum slope is the slope of the Base Texture blended with the layer, not the slope of the layer itself, bacause the layer 0 has no layers below it
| |
Maximum HeightThis is the maximum height at wihich the layer can be. It can range from 0 to 1.
In the following image the maximum height of the layer 1 is set to 0.8:
In the case of Layer 0 the maximum height is the height of the Base Texture blended with the layer, not the height of the layer itself, bacause the layer 0 has no layers below it
| |
Minimum Slope ApertureThis is the minimum value of the slope aperture the terrain must have to make layer be visible.
The slope aperture is defined as the cosine of the angle between the terrain surface normal and the normal of an horizontal plane (a vertical normal).
This means that, if minimum slope aperture is 0, the cosine of the angle cannot be less than 0, so the angle between terrain surface normal and the horizontal plane normal can range from 0 to 90 and cannot be greater than 90 degrees (cos of 90 degrees is 0), i.e. the terrain surface can range from completely horizontal to completely vertical.
Otherwise if minimum slope aperture is 1 the cosine of the angle cannot be less than 1, so the angle between terrain surface and the horizontal plane normal cannot be greater than 90, so the terrain surface must be completely vertical.
Usually minimum slope aperture cannot be greater than maximum slope aperture.
The following GIF shows the minimum slope aperture for layer 1 ranging from 0 to 1 while maximum slope is kept to 1
In the case of Layer 0 the minimum slope is the slope of the Base Texture blended with the layer, not the slope of the layer itself, bacause the layer 0 has no layers below it
| |
Minimum HeightThis is the minimum height at wihich the layer can be. It can range from 0 to 1.
In the following image the minimum height of the layer 1 is set to 0.8, while the maximum height is set to 1:
In the case of Layer 0 the minimum height is the height of the Base Texture blended with the layer, not the height of the layer itself, bacause the layer 0 has no layers below it
| |
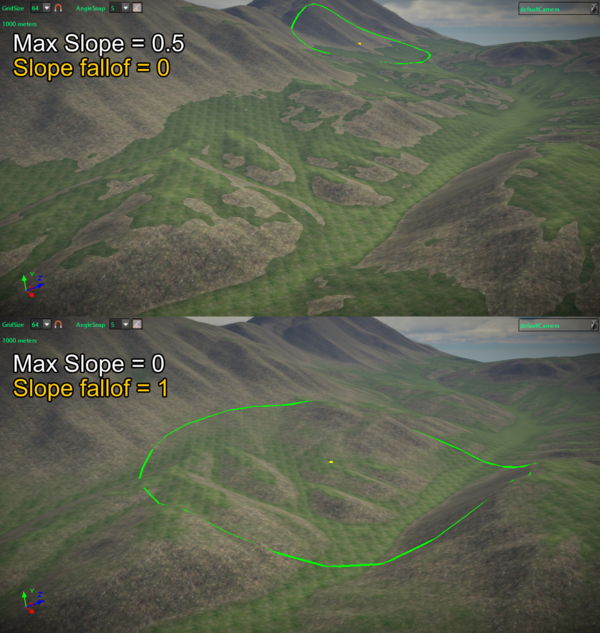
 Slope fallofThe slope fallof is the amount of smooth that must be applied to the slope mask of the layer.
In the following image it is showed the slope fallof set to 0 and slope fallof set to 1.0 for layer 1:
In the case of Layer 0 the slope fallof is related to the slope of the Base Texture blended with the layer, not the slope of the layer itself, bacause the layer 0 has no layers below it
| |
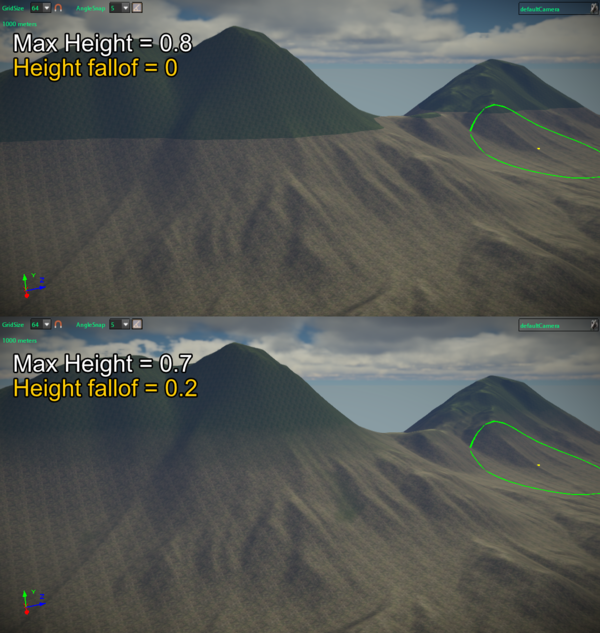
 Height fallofThie height fallof is the amount of smooth that must be applied to the height mask of the layer.
In the following image it is showed the height fallof set to 0 and height fallof set to 1.0 for layer 1:
In the case of Layer 0 the height fallow is related to the height of Base Texture blended with the layer, not the height of the layer itself, bacause the layer 0 has no layers below it
| |
|
|
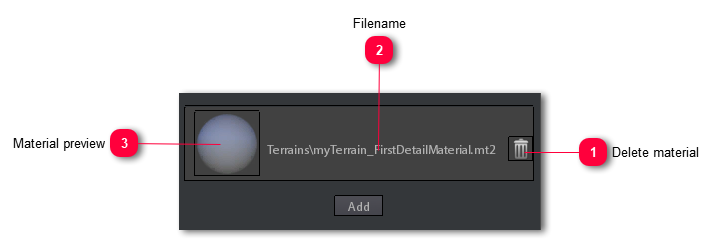
 Detail materialsDetail materials are additional 4-layers materials applied on additional decal-like terrain surfaces that increase the total number of layers that a terrain can have.
Like decals these surfaces are blended using the layer 0 mask of their assigned material. Their material mask is mapped for covering all the terrain surface. To speed-up rendering these surfaces do not cover the whole terrain but they are rendered only on those parts of the terrain in which their layer 0 mask value is > 0.
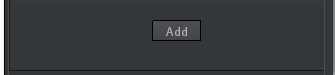
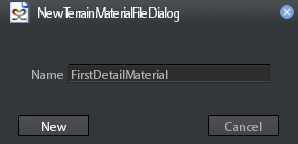
To create a new detail material and enqueue it into the detail material stack click on add button.
A NewDetailMaterialFile dialog will appear:
|
|
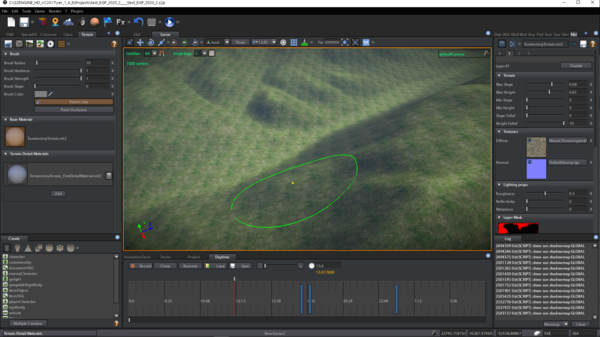
When you open the paint tool a circular green brush appears in the
scene viewport.
Once you have configured the materials you can start painting them on the terrain.
To start painting you have to:
-
Select the material to paint, base material or one of the detail materials, by clicking on the material preview icon.
-
Select the layer of the material you want to paint.
-
Holding left mouse button into the
scene viewport where you want to paint.
To erase what you have painted you have to hold Left-Control Key and hold Left Mouse Button while pass brush on the part you want to erase.
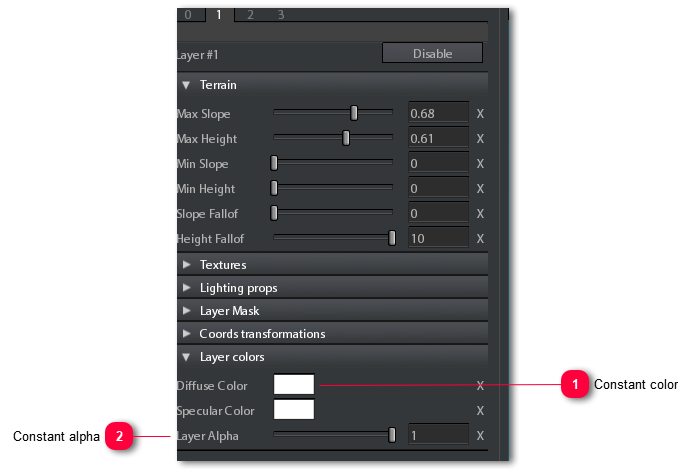
ADDITIONAL LAYER SETTINGS
There are couple of additional settings you can do for customizing the layers of the terrain. They work just like in
layers in standard materials, but they are very useful when working on terrain layers:
Constant colorThe terrain layer is colored uniformly with this constant color.
|
|
Constant alphaThis is a constant alpha value for the layer, i.e. the layer is uniformly alpha blended with the layer below it.
|
|