S2ENGINE HD 2023
User guide
×
Menu
Index

ItemTAG

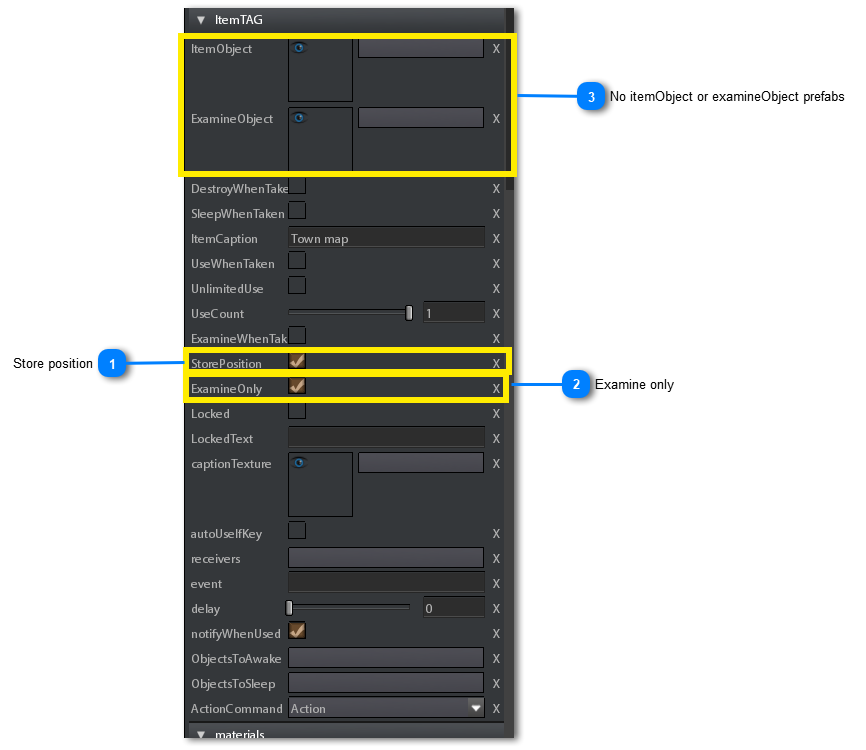
ItemTAG is the item representation before Player picks up it. In other words, to make player taking an item you have to place an ItemTAG into the scene.
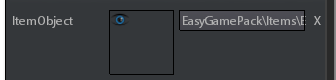
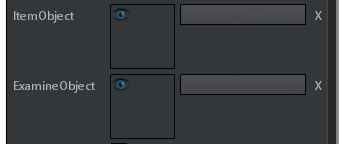
It is connected to its corresponding itemObject through the itemObject prefab. See parameters below.
 
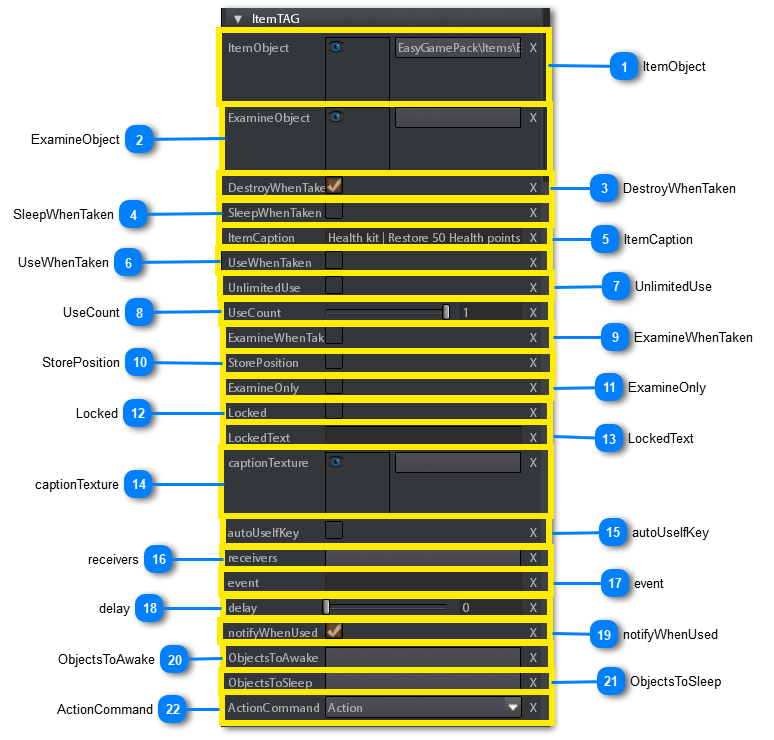
Following are the specific parameters of an itemTAG.
6.3.2.1. ItemTAG
1

ItemObject

1. ItemObject
<TODO>: Insert description text here...
2

ExamineObject

2. ExamineObject
<TODO>: Insert description text here...
3

DestroyWhenTaken

3. DestroyWhenTaken
<TODO>: Insert description text here...
4

SleepWhenTaken

4. SleepWhenTaken
<TODO>: Insert description text here...
5

ItemCaption

5. ItemCaption
<TODO>: Insert description text here...
6

UseWhenTaken

6. UseWhenTaken
<TODO>: Insert description text here...
7

UnlimitedUse

7. UnlimitedUse
<TODO>: Insert description text here...
8

UseCount

8. UseCount
<TODO>: Insert description text here...
9

ExamineWhenTaken

9. ExamineWhenTaken
<TODO>: Insert description text here...
10

StorePosition

10. StorePosition
<TODO>: Insert description text here...
11

ExamineOnly

11. ExamineOnly
<TODO>: Insert description text here...
12

Locked

12. Locked
<TODO>: Insert description text here...
13

LockedText

13. LockedText
<TODO>: Insert description text here...
14

captionTexture

14. captionTexture
<TODO>: Insert description text here...
15

autoUseIfKey

15. autoUseIfKey
<TODO>: Insert description text here...
16

receivers

16. receivers
<TODO>: Insert description text here...
17

event

17. event
<TODO>: Insert description text here...
18

delay

18. delay
<TODO>: Insert description text here...
19

notifyWhenUsed

19. notifyWhenUsed
<TODO>: Insert description text here...
20

ObjectsToAwake

20. ObjectsToAwake
<TODO>: Insert description text here...
21

ObjectsToSleep

21. ObjectsToSleep
<TODO>: Insert description text here...
22

ActionCommand

22. ActionCommand
<TODO>: Insert description text here...
 
When the player picks-up an itemTAG, he sends an ACTION message to the itemTAG, the itemTAG replies to the player with a message TAKE

containing all important parameter values (for example itemObject prefab filename, item caption, unlimitedUse and the other flags.


Examine Only Items
 
There are cases when player doesn't need to store an item into the inventory to examine it.
 
Think, for example, to a photo, or a map, in a typical horror walking simulator:
the player can examine it, read some text on the back of the photo, then placing it in the same point he has taken it.
 
In this case you can use a itemTAG that isn't connected to any itemObject prefab.
The following are the parameter settings of a typical ItemTAG used in this way:
6.3.2.1. ItemTAG
1

Store position

1. Store position
Check this to make Player remember where to put the item once he has examined it
2

Examine only

2. Examine only
As you say: do not store in the inventory
3

No itemObject or examineObject prefabs

3. No itemObject or examineObject prefabs
In this case there is no need to use these parameters. Otherwise the player could think he has to store the item in the inventory.
 
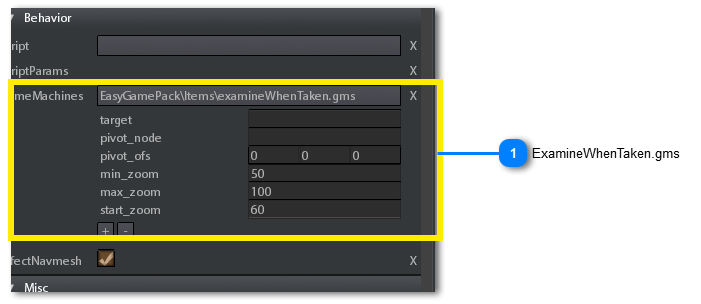
In addition to these parameters you need to set the examineWhenTaken.gms gameMachine into the related ItemTAG parameter. See also premade items.
6.3.2.1. ItemTAG
1

ExamineWhenTaken.gms

1. ExamineWhenTaken.gms
 
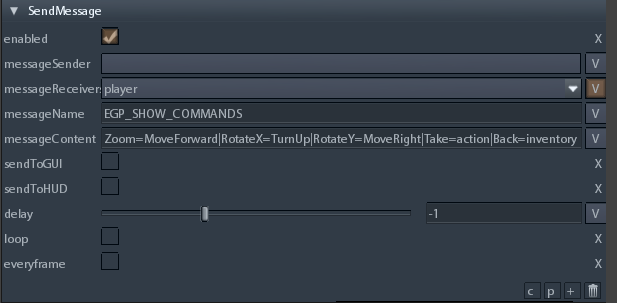
When player want to place back the item he has to press a predefined command that, by default, is the inventory command.
 
If you want to change this you have to do the following steps:
 
  • Change the content of EGP_SHOW_COMMANDS message sent using the SendMessage action into the Setup state.
This is used to setup the list of commands that are showed when examining the item (see commands panel)
As you can note the content of the message is a formatted string. The format is CommandName1=Command1|CommandName2=command2|....
In this case the last command is Back=inventory. You can change this with every other command you want.
 
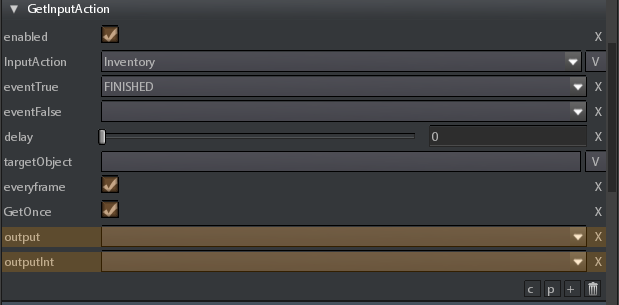
2. Change the GetInputAction action into the Inspect state. By default the input action set is Inventory, you have to change it with the command you specified into the formatted string above exaplined.