Player character has some pre-defined hard coded command slots.
An input action/axis can be assigned to each of these command slots for making player to trig an action when given input is pressed.
Following is an example about how to assign the input button for making player to show/hide inventory.
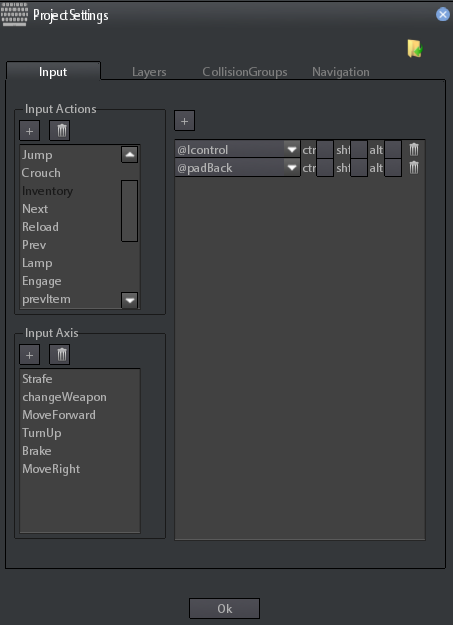
In the Input map section of the project configuration dialog check for "
inventory" input action, or create a new action by yourself (see
input mapping).
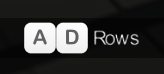
In the default project configuration Inventory input actioin is called "inventory" and it is bound to left control key and back pad button.
You can change the bound controls as you want, or create a new command for controlling inventory.
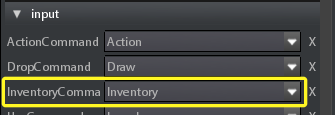
Now you can select the player and check for InventoryCommand into the input section of the class parameters.
By default the inventory command is bound to the inventory action we have already configured into the project settings, but you can assign it every action you want.
Simply click on the combo box dropdown arrow and choose among the list of actions configured:
You can repeat this procedure for every command you want to assign.
| | It is not necessary to assign all commands, it depends about the type of game you want to create.
|
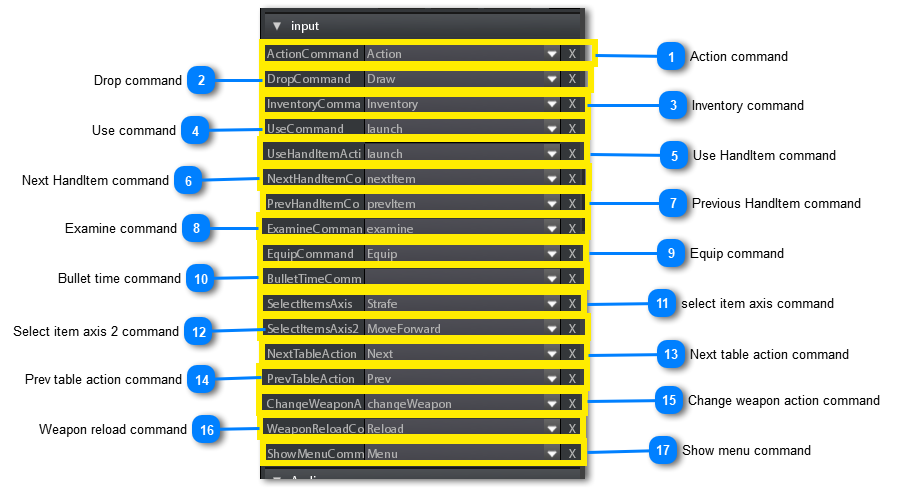
Following is the complete list of configurable commands until now:
 Action command<TODO>: Insert description text here...
|
|
 Drop command<TODO>: Insert description text here...
|
|
 Inventory command<TODO>: Insert description text here...
|
|
 Use command<TODO>: Insert description text here...
|
|
 Use HandItem command<TODO>: Insert description text here...
|
|
 Next HandItem command<TODO>: Insert description text here...
|
|
 Previous HandItem command<TODO>: Insert description text here...
|
|
 Examine command<TODO>: Insert description text here...
|
|
 Equip command<TODO>: Insert description text here...
|
|
 Bullet time command<TODO>: Insert description text here...
|
|
 select item axis command<TODO>: Insert description text here...
|
|
 Select item axis 2 command<TODO>: Insert description text here...
|
|
 Next table action command<TODO>: Insert description text here...
|
|
 Prev table action command<TODO>: Insert description text here...
|
|
 Change weapon action command<TODO>: Insert description text here...
|
|
 Weapon reload command<TODO>: Insert description text here...
|
|
 Show menu command<TODO>: Insert description text here...
|
|
The commands panel is a group of UI elements containing the image of keys/buttons associated to commands that it is possible to use in a certain moment.
For example when you open the
items page and select an item the commands panel will show what are the commands that you can use on the item.
As for the HUD and the Inventory the commands panel is managed directly by the Player Character at low-level.
When selecting an element in a page (for example an item or a document) of the inventory, the player automatically searches for the commands panel elements (by their names) and start to fill them with the command data associated with the selected inventory element.
So, the elements of the commands panel must have specific names that help the Player to recognize them and update them with the current commands.
The number of elements you insert into the UI during editing will be the maximum number of commands that player can show at the same moment.
| | The commands panel can be updated also by sending a message to the player containing the commands format string.
This is what is done by the examine documents gamneMachine.
|
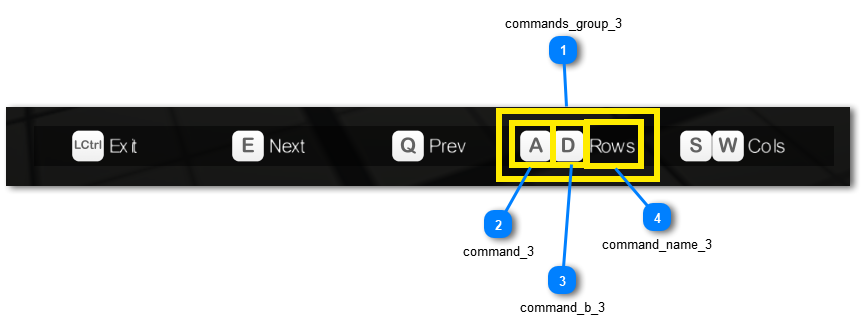
Following image is an example of working commands panel.
We show what names the elements inside panel must have to be recognized.
commands_group_3<TODO>: Insert description text here...
|
|
command_3<TODO>: Insert description text here...
|
|
command_b_3<TODO>: Insert description text here...
|
|
command_name_3<TODO>: Insert description text here...
|
|