Prefabs are the one of S2Engine HD asstype, they contains the description of one or more objects, including class they belong to, all base parameters, and all class specific parameters.
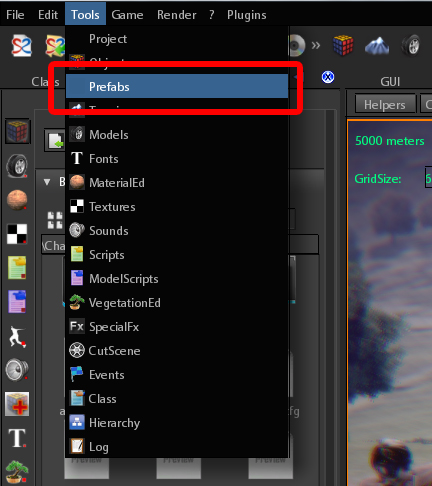
Basing on that description S2Engine HD can instantiate the objects given the prefab. To access Prefabs Inspector you can select Tools->Prefabs from main menu as showed in the following image:
- Attention
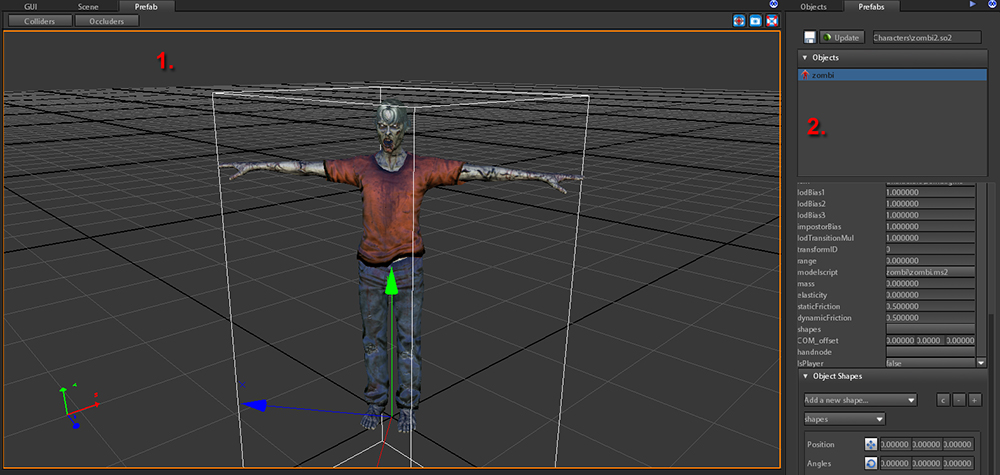
- In this case the prefab Inspector will open void, i.e. without any description inside it. Prefabs Inspector tool is composed by 2 panels:
- Prefab viewport. see also Viewports
- Prefabs parameters editor.
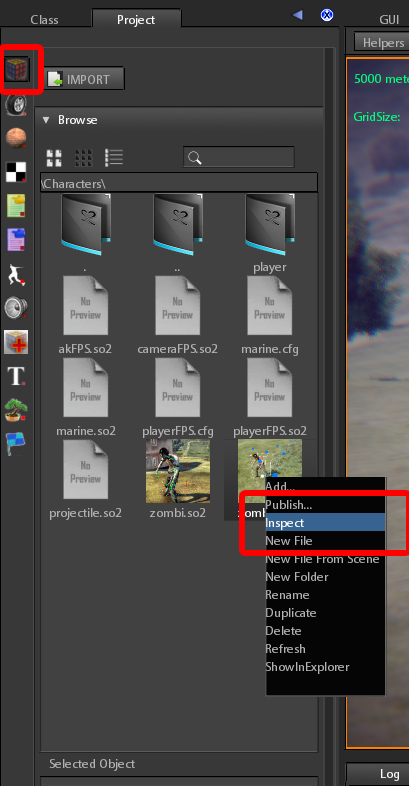
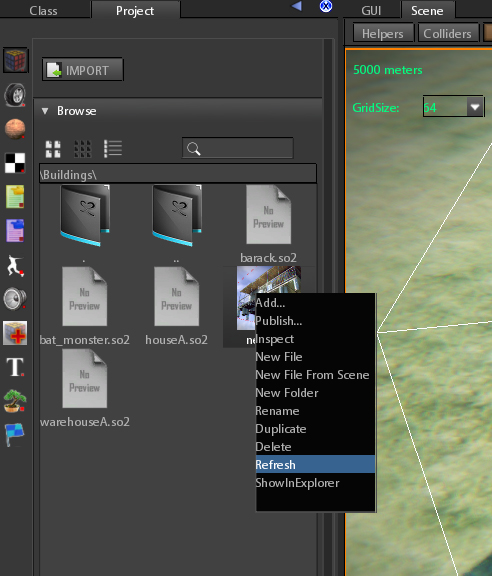
If you want to open Prefab Inspector with a prefab already loaded, or simply you want to inspect an already created prefab you must:
- open the prefabs browser (also called objects browser)
- click right mouse button on the icon of prefab you want to edit
- select inspect on the appearing drop-down menu
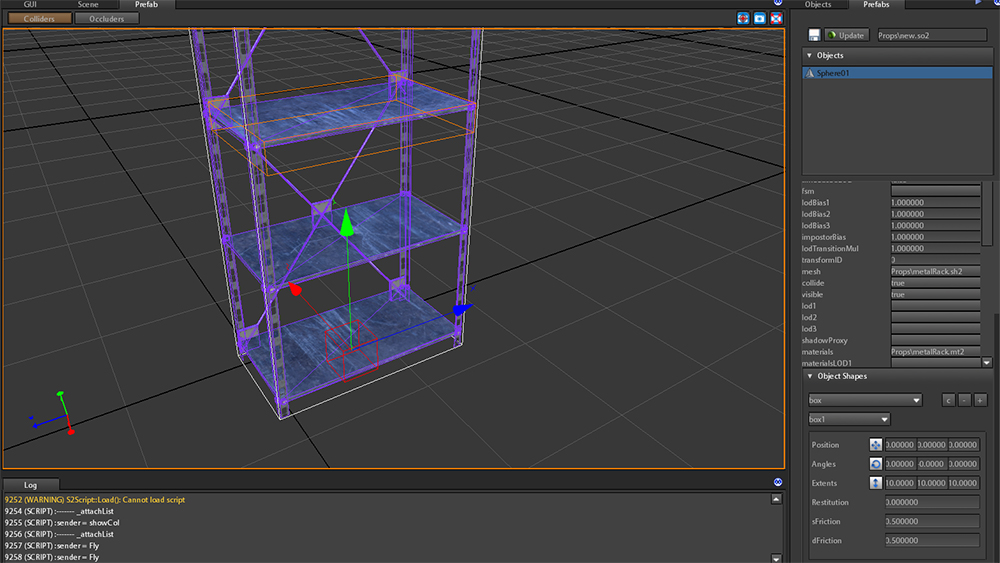
Prefabs parameter editor lets you to edit parameters of the objects definitions inside the inspected prefab. The following is a detailed description of the prefabs panel:
- On the top of the panel:
- you can save the modified prefab clicking on save button
- you can apply the changes pressing the update button
- you can see the prefab filename path
- the list objects inside the prefab. You can select the object you want to see/edit parameters.
- Attention
- you cannot modify it
- the class parameters of the current selected object to edit.
- Shapes: an object can have shapes definition for physics simulation. see Edit Shapes.
- Attention
- Every time you edit a parameter of the selected object click on update button to apply changes.
- Note
- The parameters of a prefab object are the same you can edit in the ClassInspector tool, the difference is that in the last case changes are applied directly to the object inside the scene.
Edit Shapes
Shapes are used by physics system as proxies for collision detection. They are useful when it is not possible to approximate collision using only the basic rigid body shape, see Collision Shapes and Rigid Body.
To add a new shape:
- click on the Add new shape.. combo box and choose box or sphere basing on the type of shape you want to add.
- then click on + button as showed in the following image
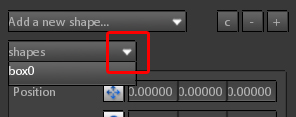
Once created shapes you can select the shape you want to edit from the shapes combo box as showed in the following image.
To show shapes into the prefab viewport click on colliders check box. See also Viewports .
Main collider is showed in violet color, secondary shapes are showed in orange color. The current selected shape is showed in red color and has the gizmo.
Once selected the shape you can edit by changing:
- position: translate the shape. You can do it by manually changing values or by moving gizmo after clicking on the

icon
- angles: rotate the shape. You can do it by manually changing values or by moving gizmo after clicking on the

icon
- extents: scale the shape. You can do it by manually changing values or by moving gizmo after clicking on the

icon
- restitution: it is the bouncing coefficient
- sFriction: static friction coefficient
- dFriction: dynamic friction coefficient
Create Prefabs From Scratch
To create a prefab from scratch:
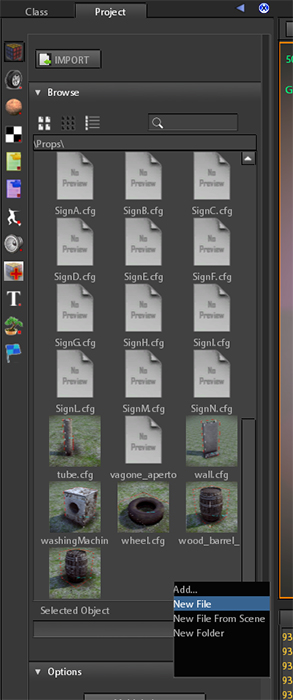
- select the folder you want to create new file in the prefabs browser
- right click mouse button on a blank space inside the prefabs browser
- select new file on the appearing drop-down menu
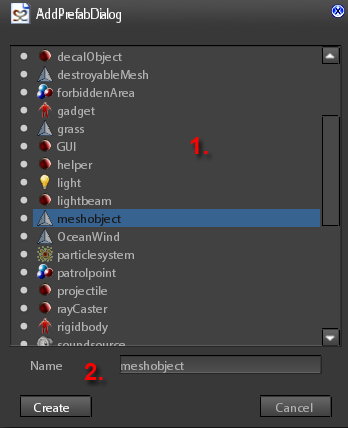
A new dialog will appear, it will let you to select the class you want the new object must belong.
- select the class
- change the name you want to assign to the new prefab
Create Prefabs From Scene
New Prefabs can also be created from objects already existing into the scene:
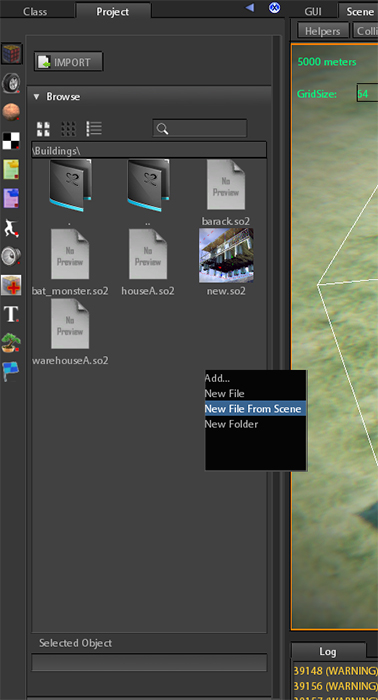
- select the folder you want to create new file in the prefabs browser
- right click mouse button on a blank space inside the prefabs browser
- select new file from scene on the appearing drop-down menu
The pick Object Dialog will appear. This dialog lets you to select one or more object from the scene.
There are 2 lists:
- left list: the list of selected objects
- right list: the list of object to select inside the scene
As showed in to the above image, you can select objects in various ways:
- Pick Object: click on this icon and then select the object directly from scene
- Get selected objects: click on this icon if you have previously selected a group of objects in the scene
- Select from right list: you can select an object from right list and then click this icon to move it inside the left list (selected objects).
- Unselect objects: clicking on this icon you will move selected objects in the left list to the right list, unselecting them.
Update Prefabs From Scene
Already created prefabs can be updated in a simple way:
- select the file you want to update in the prefabs browser
- right click mouse button on the file icon
- select Refresh on the appearing drop-down menu
The Pick object dialog will appear. It lets you to choose objects you want to replace/update into the chosen prefab.


