Tracks are a special kind of terrain spline used for drawing dirt roads.
Usually for creating a
dirt road you need a special kind of material marked as
decal.
Just Like decals, tracks are composed by a single layer of geometry that adapts to terrain surface just like decals adapt to objects surface .
To access the tracks panel click on tracks tab in the splines tool panel.

 Track editing
In this section you can edit points of an already created track.
The buttons on this section are radio buttons, this means that a button remains pressed until you click on another button on the toolbar.
-
 Add a new track point Add a new track point
When this button is pressed, every time you press left mouse button on a point of the terrain a new track button is added following the previous one.
If you hold the left mouse button when adding the new point, you can move it on the terrain until you reach the desired position.

The last point of the track is the one you cannot move. If you click on it a new point will be created and moved.

Do not forget to select a track before adding new points.
If you click on an already created point you can simply move it on the terrain as described before.
You can also add a new point between two points already created:
-
 Move track point Move track point
When this button is pressed you can only select and move a point on the track.
You can move it in two ways:
-
Sliding on the terrain: As described when adding a new point, select the point a hold left mouse button while moving.
-
Use gizmos: You can use the point gizmo for moving along one axis separately.
You can move also the up axis gizmo for placing the track point at a certain distance from the terrain surface.
As described below you can then adapt the terrain to the track
-
 Delete selected track Delete selected track
pointThis is the only button that, if pressed, doesn't work as radio.
If you want to delete a track point simply:
-
-
|
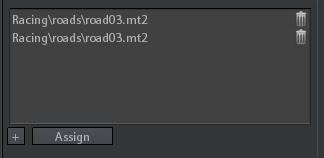
 Tracks list
Here is where you can create a new track or select / delete an already created track.
To create a new track:
-
Click on  button to add a new slot to the list -
Select the newly created <empty> slot and click on  button. -
Choose the material you want to assign to the track from the appearing material browser dialog.
To delete an already created track:
-
Simply click on trash  icon of the track to delete's row.
To select a track click on the related row into the list.
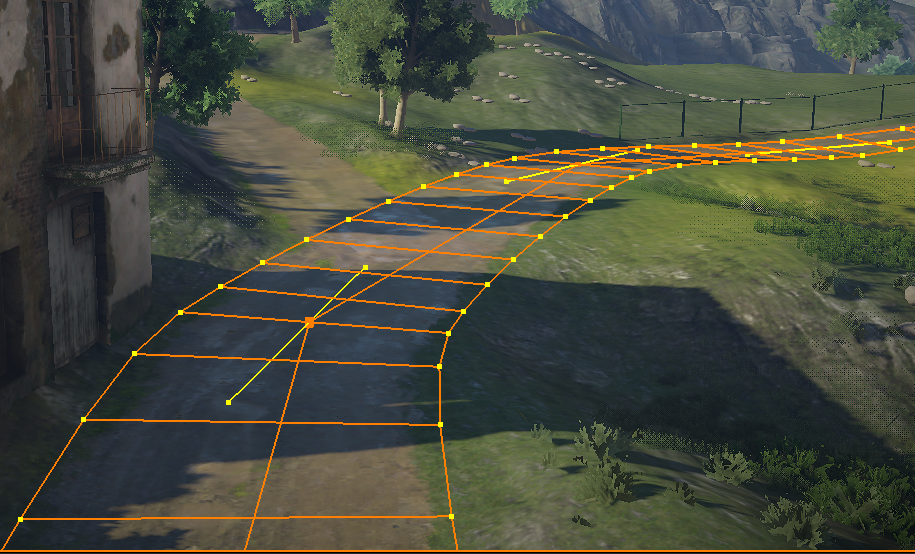
The selected track will be showed with an orange wireframe in the scene viewport.
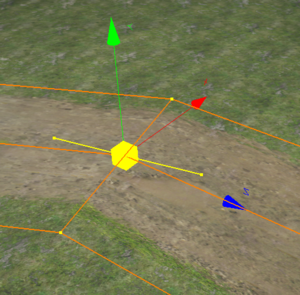
The track points are showed as orange boxes in the middle of the track section.
When you select a track point it becomes yellow.
|
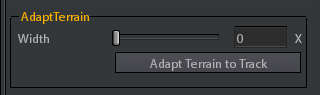
 Terrain adapting
Sometimes you could need to elevate or lower the track from the terrain surface.
In this case you can move tracks points up or down and then use the terrain adapting tool to make the terrain following the track elevation.
To do this:
-
Choose the track border width ( width parameter). It is used as tolerance width to avoid artifacts. It can be higher than the real track width. -
Click on Adapt Terrain To Track button.
Adapting border width must be at least half of the track width to avoid artifacts
|
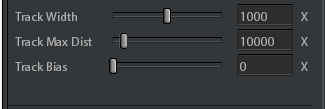
 Track parameters
-
The width of the track in centimeters.
-
The maximum distance at which the track can be drawed (in centimeters). It is used for optimization purpouse.
-
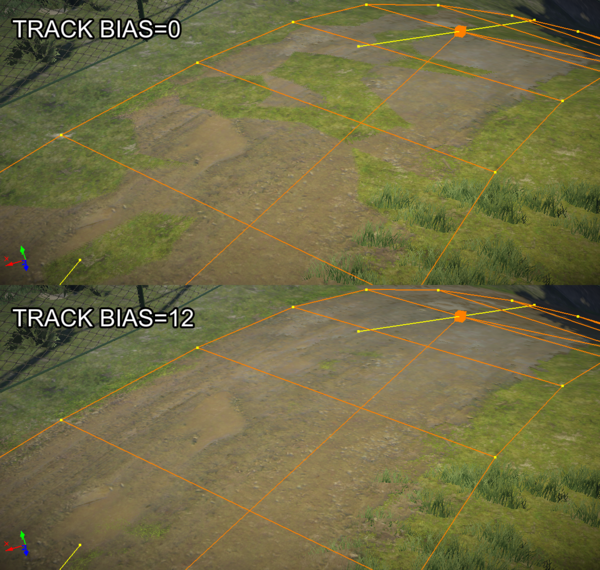
This parameter is used for avoiding decal material artifacts due to z-buffer precision.
It expands the track decal geometry from the terrain surface for avoiding z-fighting artifacts, as showed into the following image:
|