Creating Terrain

A terrain can be created only one time per scene.


Once created, a terrain cannot be deleted, although you create a new scene

 
To create a terrain you have to first create a new scene, if it wasn't already created.
After created the scene, you can create the terrain by clicking on the icon on the main toolbar.
 
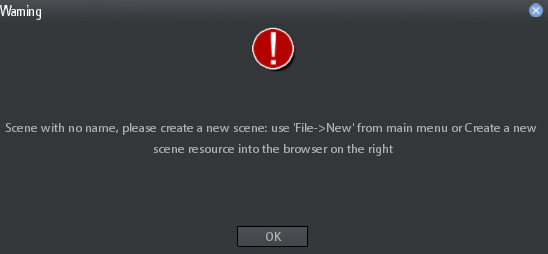
If you try to create a new terrain without creating a scene first, the following warning message appears:
 
After clicking on the terrain creation icon a setup dialog appears:
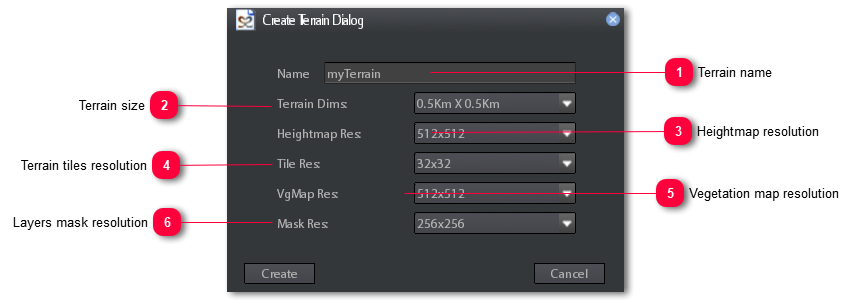
3.4.10.1. Creating Terrain
1

Terrain name

1. Terrain name
Input box that must contains the name of the terrain material you want to create.
When terrain is created a new material, with the same name as terrain, is also created into the Materials/Terrains/ folder.
2

Terrain size

2. Terrain size
This combo box allows you to set the world dimensions (expressed in Kilometers) of the terrain.
Available dimensions are 8x8,4x4,2x2,1x1,0.5x0.5 Kilometers.
3

Heightmap resolution

3. Heightmap resolution
The resolution of the heightmap.
Bigger the resolution more terrain details you obtain. Note that this implies also more used system and graphics memory.
When you choose the dimensions of the terrain this is set automatically for getting 1:1 factor witth terrain size (1 heightmap pixel = 1 meter).
4

Terrain tiles resolution

4. Terrain tiles resolution
Starting from S2ENGINE HD 1.4.6 B8 version the terrain is divided into tiles.
Each tile represents a small patch of the whole terrain and has more than one level of detail (LOD), used basing on the distance from the camera.
Tiles of the same LOD are drawed in groups of 512 pieces, each tile group is drawed in one shot.
Tiles resolution matches 1:1 the resolution of the heightmap, and it is important to determine the number of total tiles composing the terrain, then the number of draw calls.
 
For example a 1024x1024 heightmap divided in tiles of 32x32 resolution generates (1024/32 * 1024/32) = 1024 tiles.
Too much tiles means too many draw calls, but too few tiles make the culling system hard to hide no visible tiles, so be carefull when choosing this parameter.
 
Luckily Tiles resolution is computed automatically when choosing the dimensions of the terrain for optimal performances.
5

Vegetation map resolution

5. Vegetation map resolution
Vegetation Map resolution.
Vegetation map is a map containing information about where are placed the objects of a given vegetation layer.
More high is this resolution more precisely you can place vegetation on the terrain.
When you choose the dimensions of the terrain this is set automatically for best quality/performance ratio.


The vegetation map uses exclusively system memory so it must be set carefully for preventing out of memory problems.

6

Layers mask resolution

6. Layers mask resolution
This is the resolution of the Terrain textures layer mask and of the terrain colour map.
It consumes more memory (especially graphics memory) than all the other maps and it is responsible of the terrain texture splatting. Bigger the resolution more details you can paint on the terrain.
 
When you click on Create button a new plain terrain is created together with an heightmap, a colormap and a layer mask.
Colormap and Layer mask will be used into the terrain material (see paint).

IMPORTING HEIGHTMAP
From S2Engine HD 1.3.1 version heightmaps can be imported as external images.
 
Supported formats are:
  • 8-bit uncompressed TGA image
  • 16-bit TIFF image
 
The image must be greyscale and it must have the same resolution as the Heightmap Resolution, set when created the terrain.
To Import an heightmap you can follow 2 ways:
 
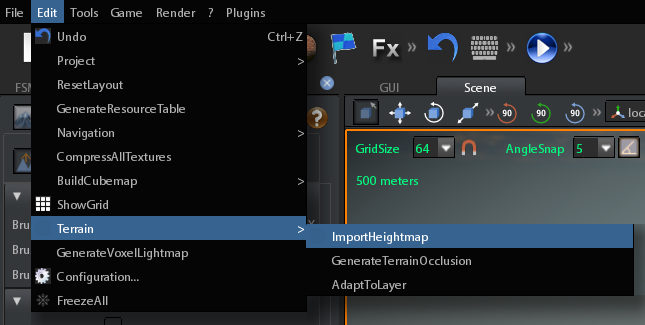
  • Click on Edit->Terrain->ImportHeightmap on the main menu:
     
  • Open the Terrain Properties Tool and click on importHeightmap:
     
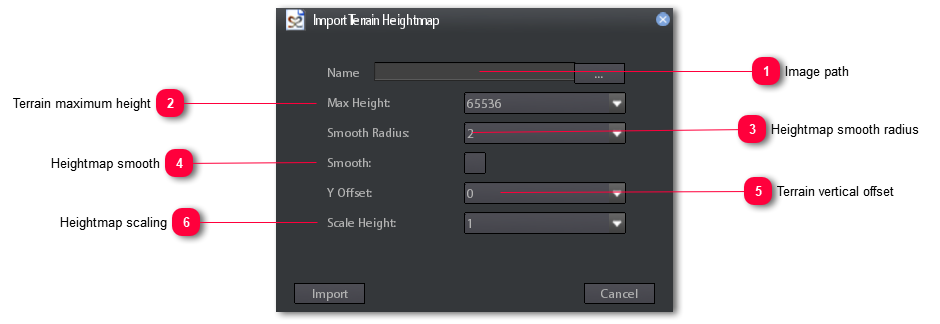
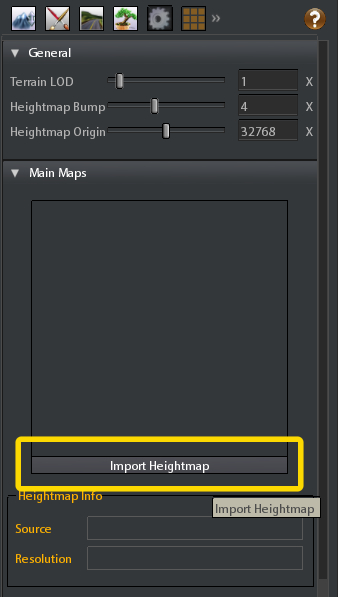
    Once clicked on the button, a dialog appears:
    3.4.10.1. Creating Terrain
    1

    Image path

    1. Image path
    Filename of heightmap image. Click on browse button to choose the one you want to import.
    2

    Terrain maximum height

    2. Terrain maximum height
    This is the maximum height the terrain must have after the heightmap is imported. This value is expressed in centimeters and it can be between 0 and 65536 (655 meters).
    If values of the heightmap, after scaling and offseting transformations, are greater than this value they are clamped.
    3

    Heightmap smooth radius

    3. Heightmap smooth radius
    Here you can set the radius of the smoothing. Greater values means more smooth.
    It has effect only if you check Heightmap smooth flag.
    4

    Heightmap smooth

    4. Heightmap smooth
    Check this to prevent the step artifact due to the limited precision of heightmap values (expecially 8-bits heightmap images)
    5

    Terrain vertical offset

    5. Terrain vertical offset
    This is the vertical offset from sea level of the heightmap.
    The offset is applied before the heightmap is used for displacing the terrain, so it must range between -32768 and 32768 (infact the distance between -32768 and 32768 is just 65536).
    Positive values elevate terrain position, negative ones lower terrain position.


    if the terrain vertical offset plus the terrain height is greater than 32768, the terrain height is campled.
    if the terrain height, after the vertical offset, is smaller than -32768, it is clamped.

    This option is marked as deprecated.
    Infact to change the terrain vertical position, avoiding clamping, it is convenient to left Y offset to 0 and to use the Heightmap Origin parameter in Terrain properties tool, because it is applied after the terrain displacement.
    6

    Heightmap scaling

    6. Heightmap scaling
    When an heightmap is imported you can choose to multiply its values for a scale factor before it is used for displacing the terrain.
    This has the effect to amplify the difference between valleys and mountains:


    If, after scaling the heightmap, the terrain height is greater than the maximum height, it is clamped.