 |
S2ENGINE HD
1.4.6
Official manual about S2Engine HD editor and programming
|
 |
S2ENGINE HD
1.4.6
Official manual about S2Engine HD editor and programming
|
Cutscenes are animated sequences made by interpolating scene params (just like brightness, saturation, DOF, ...) and scene objects params (position, orientation, animation and musics fading, ...). They are composed by a list of Tracks. Each track executes the interpolation of time-changing param values that are stored inside a list of keyframes. Each track has its own list of keyframes. A track is associated to a sceneobject in the case that it interpolates a sceneobject param, otherwise track interpolates scene params or titles text params. Cutscene can be played using Scripting but also using GameMachine.
Cutscene tool is called by clicking on the related icon as showed in the following image:

When Cutscene tool is called cutscene tab is opened on the left panel and tracks tab is opened on the center-bottom panel.
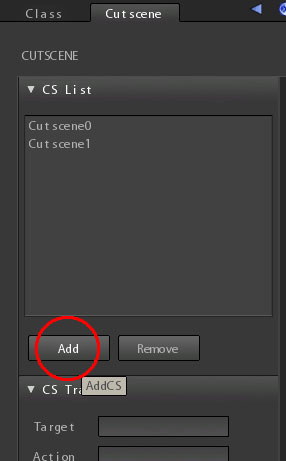
To add a new cutscene click on Add button inside the Cutscene tab as showed in to the following image:
A new dialog will appear that ask you to choose a name for the cutscene to create:
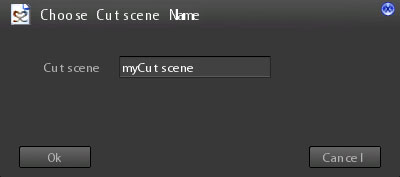
Digit the name you want cutscene must have and do not forgot to press enter for applying the change. Then click on OK button to confirm the operation. You will see the new cutscene name added into the CS list block of the cutscene tab. To select the cutscene for editing click on the cutscene name inside the CS List block.
Cutscene params are located on the tracks frame as showed into the following image:

On the right there are:
On the left there are:
Tracks are the core of the cutscene system. They contain a list of keyframes which values are interpolated basing on the timeline value. Each track can interpolate only one param, we say that it can perform only one action, for example interpolating the positions of an object over the time means performing translate action. The action can be performed on a SceneObject , on the whole Scene or on the titles screen. A Track belongs to a specified class basing on the action it can perform, so we say that a track performing the translate action belongs to the translate class. Another example of action is the rotate action: Just like translate track, a track performing rotate action must be associated to an object (the object to rotate). Tracks are showed into the tracks tab. Selected tracks are showed as dark grey rectangle, all other tracks are in blue as showed into the following image:
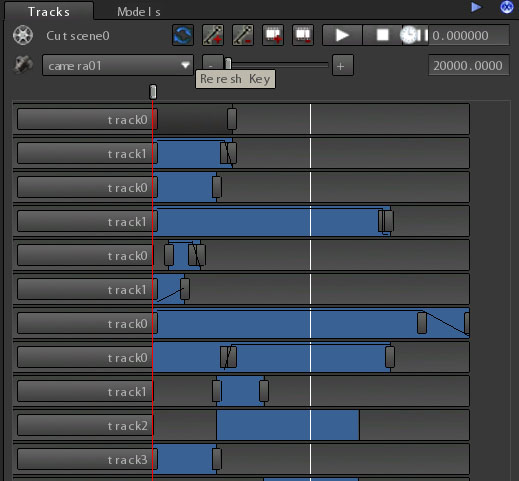
To select a track simply click on the grey rectangle on the left containing the name of the track. Tracks keyframes are showed as small light grey rectangles inside the track rectangle, selected keyframes are in red. To select a keyframe you first must select the containing track and then click on the keyframe rectangle.
To create a track first select the cutscene in which you want to insert the track and than click on the Add track icon as showed into the following image:
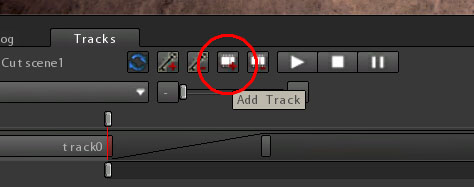
After click on the add track icon the track creation dialog appears as showed in to the following image:
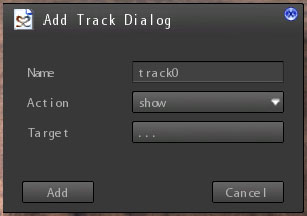
This dialog lets you to configure the track before adding it to the cutscene.
When ready click on Add button to add the track. You will see a new track in the Tracks tool tab as showed in the following image:

In our example we have created a new track called moveCamera associated to a translation action and a camera object.

Basing on the the associated action class, a track can have specified params that can be edited in the CS track section of the Cutscene tool tab as showed in the following image:
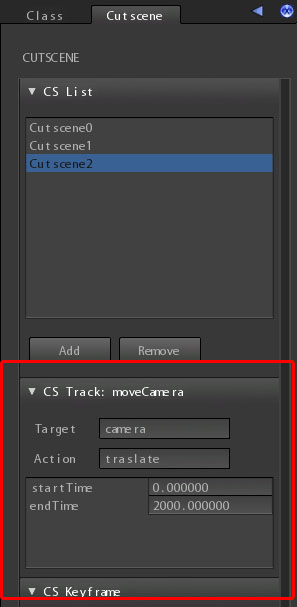
In our example a track called moveCamera is associated to a translate action and has camera object as target. Tracks have two basic common params:
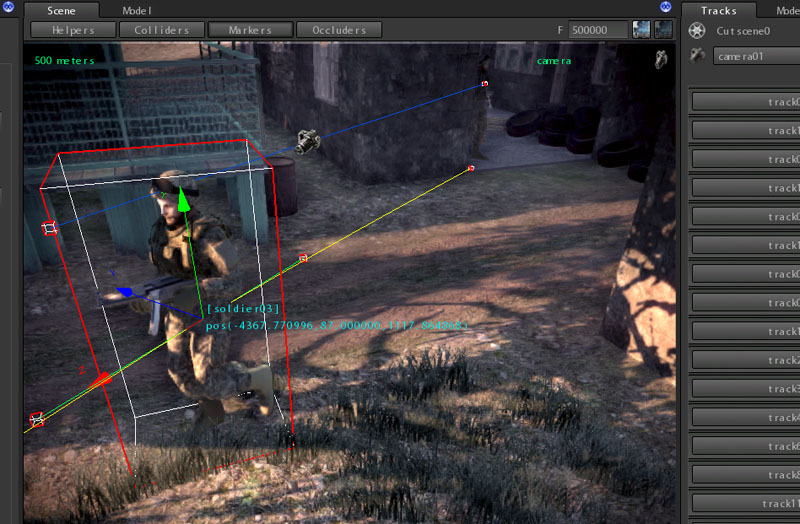
As said translate track must be associated to a SceneObject. Translated tracks are showed into the sceneview as curved lines: selected tracks are showed in yellow, all the others in blue. Track keyframes are showed as green balls on the curve, selected keyframes are showed as wire boxes. When the translate track is selected (by clicking on the track name button) also the associated object is selected. In the above example the object is a soldier character.
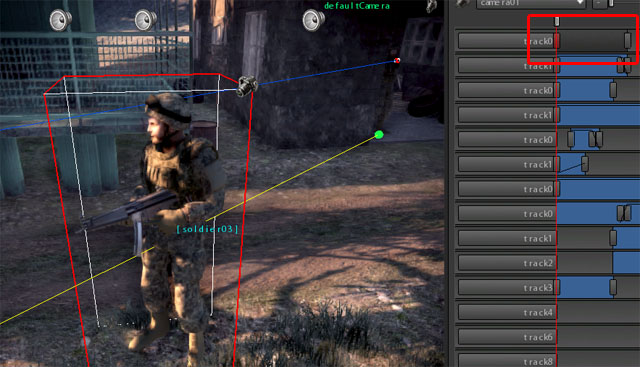
To add a new keyframe at a given time place the timeline on the specified time (by holding the top timeline thumb) and then translate the track object (the character in the example) where you want it must be at that time:

Click on the Add key button to add the new key, as showed in the following image:

The track curve will adjust accordingly. If you want to modify the value of a translate keyframe you have to select it and then you can choose two procedures:

