Zombies
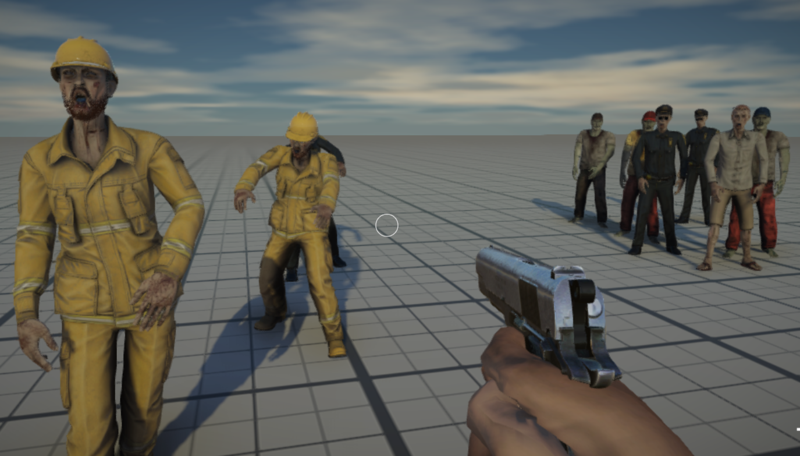
Zombie is the most simple type of enemy.
Its locomotion is basic and its logic is a sort of "seek and destroy" behaviour.
Otherwise if many zombies are placed in the level, with effective hit and death reactions, they can guarantee a decent fun.
In EasyGamePack installation there are male and female zombie prefabs.
Male zombie prefabs are located into EasyGamePack\Characters\Zombi\Male
Female zombie prefabs are located into EasyGamePack\Characters\Zombi\Female
Zombie behaviour is built up with 2 gamemachines, they are located into EasyGamePack\Characters\Zombi folder:
-
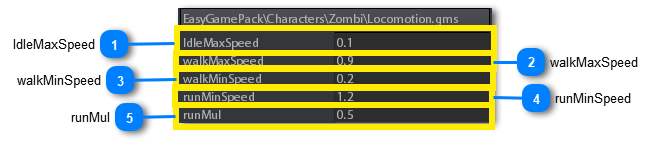
Locomotion: it determines what are the movements (animations) of the zombie basing on its direction and its velocity and how the zombie must react to a hit or the death.
-
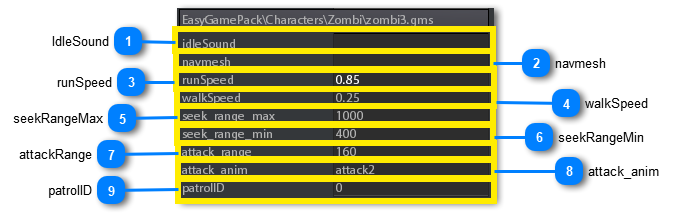
zombi3: it is the third iteration of the zombie logic. It makes the zombie to patrol and/or chase and attack the player when he is nearby.
Following are the parameters of the locomotion gameMachine:
Following are the parameters of the zombie3 gameMachine:
ANIMATIONS
Zombie animations are based on the animation blending system.
This means that every zombie has a modelscript containing the list of animations that he can perform in the gameMachine.
The modelscript contains walking, running, idles, attacks, death and hit animations. Every animation slot in the modelscript list can be a single animation or a blend1d / blend2d animation.
The animation slots in the modelscript are simply references to real source animation files, this means that changing these references you can change the animation set maintaining, at high level, the same animation names. This is why there is more than 1 modelscript containing different set of animations for a zombie.
Changing the modelscript in the zombie class changes the way in wihich zombie performs some anmations (like chasing for example).
In this version of EasyGamePack there are the following modelscripts you can use for the zombies, all of them are located in EasyGamePack\Characters\zombi\Female folder :
-
T-Pose_RootNode.ms2
-
T-Pose_RootNode2.ms2
-
T-Pose_RootNode3.ms2
They can be used also for male zombies because the source animations are the same (thanks to retargeting)
|
PATROLING
If no player is nearby, a zombie simply patrols a given zone.
A patrol zone is defined by Patrol points. Each patrol point has an ID that defines which zone it belongs to.
A zombie can patrol only one zone. You can set the ID of the zone to patrol (patrolID) in the "logic" GameMachine of the zombie.
If a zombie doesn't find any patrol point of specified ID, in order to avoid stucking, it starts to find a patrol point regardless of its ID.
|
To add a patrol point in the level:
-
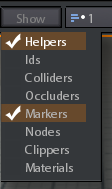
Be sure you have checked the show->helpers option in the scene viewport toolbar.
-
Select AIObjects section in the create tool
-
Select PatrolPoint class
-
Check the multiple creation button
-
Click in the scene where you want to create the point

ATTACKING
When zombie attacks player he randomly performs 2 alternative actions:
-
Biting: the biting animation is the same for all zombies. When it is performed the player character movements are blocked for a while.
-
Melee attack: When zombie performs this attack he executes an animation from the modelscript list. Since there are more than 1 attack animation listed in the modelscript, you can choose what the zombie must execute using the parameter attack_anim in the gamemachine.
CREATING A NEW ZOMBIE
If you alreay have a "static" character 3d model, the simplest way to integrate a new character for EasyGamePack is to use MIXAMO service.
MIXAMO is an online service that takes in input a static single mesh character and convert it into a skinned, animatable, model.
You can find MIXAMO service at https://www.mixamo.com/.
Once you convert your model into a skinned MIXAMO model, you can import it into your s2engine project by drag and drop the model file in the project browser folder you want to locate the character files.
Take care about some s2 importer settings:
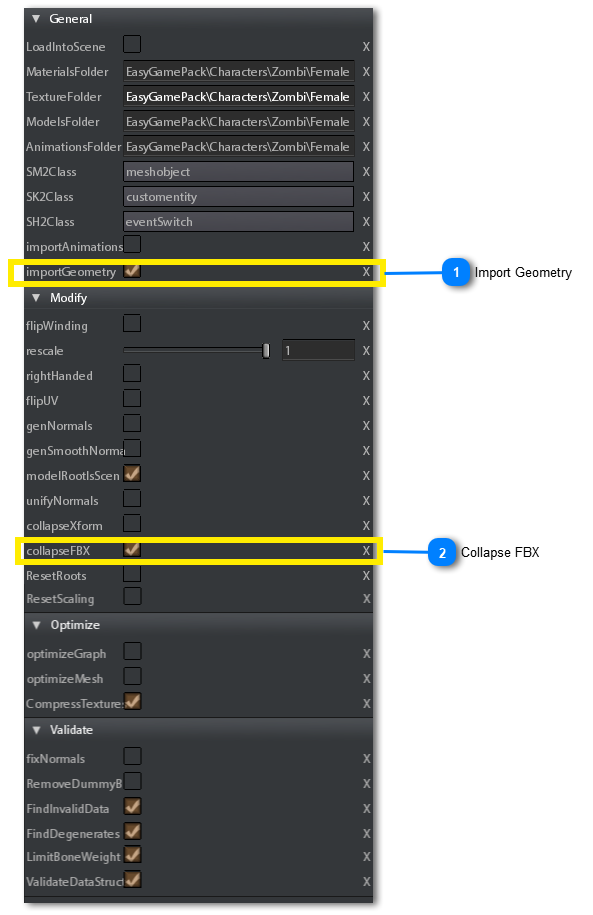
Once you have successfully imported the model you have to do some changes in order to make it compliant with EasyGamePack system:
-
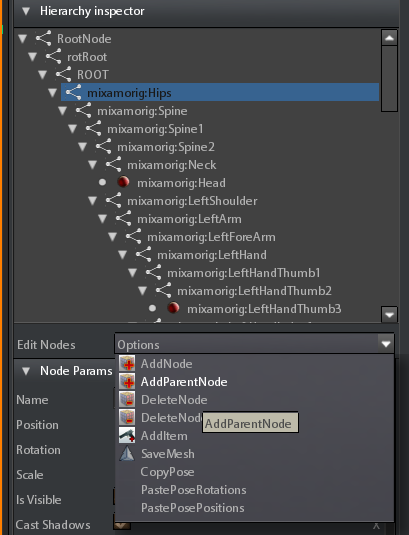
Inspect the imported model in order to open the model editor:
-
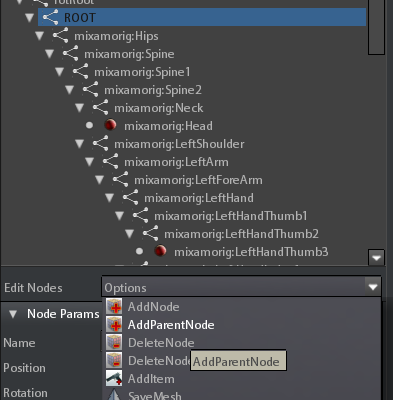
Create a parent node of the model Hips node:
-
select the HIps node
-
Click on Options combobox and choose "AddParentNode"
-
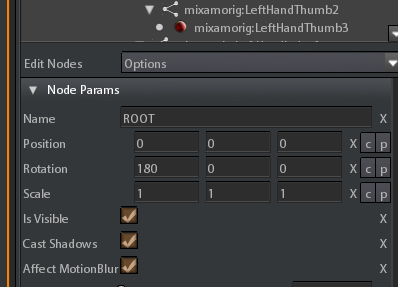
Rename the new node as ROOT and set X Rotation to 180. This should rotate the model by 180 degrees along its vertical
-
Add a parentNode on top of ROOT node following the same procedure used for Hips node:
-
Rename the new node as "rotRoot".
-
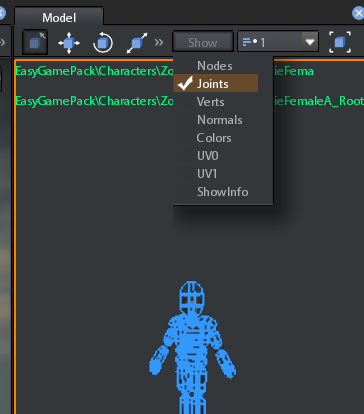
Now you must add collision capsules for ragdoll effect. We can copy them from one of the pre-made zombie models. Select one of the premade zombie models and inspect it.
-
In the model editor viewport select show->Joints to visualize the collision capsules.
-
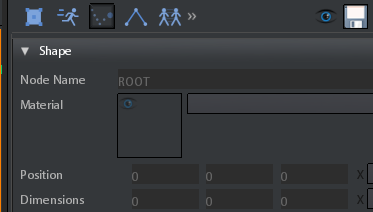
Open the Physics tab of the model editor:
-
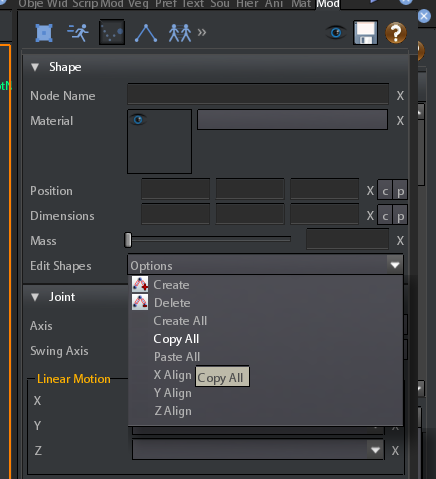
In the options combobox select "Copy All"
-
Now Select again your imported model. In the model editor physics tab choose Paste All on the combobox dropdown menu
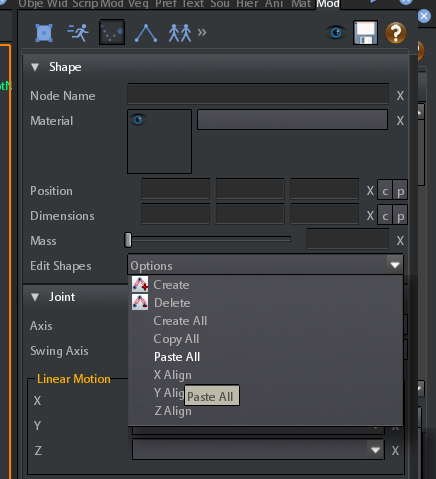 You should see the collision capsules on the new model if all gone right.After prepared the imported model you have to give it the logic for the game.The best way to do this it to change the model of a premade zombie:
 -
Insert one of the premade zombie into the scene.
-
Drag and drop your imported model into the model parameter of the premade zombie.
-
Reset the materials if needed.
